Magic floor - 3D
A beautifully crafted floor is always striking. And the desire to make a work of art out of it is unthinkable without a carefully considered relationship. Today, construction technologies make it possible to make a difficult reliable and functional floor, and the original coating to suit every taste. The article suggests making the bulk 3D floor itself. And detailed information about the procedure for creating a three-dimensional surface will help to do this with ease.
3D floor technology
The 3D floor looks impressive not only in the apartment, but also in the office and the trading floor. The color scheme and pattern of the volumetric floor can be any, and what kind of fantasy you want to realize is up to you. 3D floor technology is based on the manufacture of a three-dimensional effect in the image. The depth of the picture directly depends on the height in the last layer. For laying special materials, this technology provides:
- Decorative elements (photographs, drawings, artificial and natural materials);
- Two-component polymer mixture (transparent base and hardener).
Preparatory work
For those who want to install voluminous floors themselves, remember that this will require a lot of patience, perseverance and a craving for adventurism. Since the first time such a floor may not work. Before filling the volumetric floor, it is necessary to carry out forced ventilation. Since polymeric substances in the floor are too toxic and a respirator will not help here. In addition, the temperature in the room should be at least +10 degrees.
Preparation of a drawing for a bulk floor
First you need to decide on the pattern that you want to see on the floor. It is necessary to select and think through all the little things in advance - glass, shells and pebbles. After that, go to the advertising company that publishes outdoor advertising, and order from them a canvas (banner) with the selected photo. When placing an order, ask what quality the printer provides for printing. The resolution of the image should be from 1440 dpi, and the image is printed on matte satin. Making pictures for a 3D floor will take more money than other materials.
Preparing the foundation
First, the surface must be cleaned of all contaminants. The surface should be perfectly dry, no more than 4% humidity is allowed. If the bulk floor is laid on a metal surface, then it must be degreased. All cracks are filled with sealant or epoxy. And the pits need to be repaired with quick-drying mixtures, which include a quartz-epoxy base. A hard surface is treated with a shot-blasting method, and soft surfaces are treated with grinding. At the same time, you need to do a fillet, and then carry out dust removal using an industrial vacuum cleaner.
To enhance the absorption and adhesion of the surface, they recommend priming with a special primer. It will fill all the small pores and penetrate deep into concrete. This process connects the concrete base well with the base layer of the bulk floor. Many people think that such a floor will be cold, but this is a fallacy. Three-dimensional floors can be combined with a warm floor, and it will become the main heat source in the house. But a 3D heated floor is harder to operate.
Base layer
It is only necessary to proceed to the stage of this work 4 hours after priming the surface. The base layer may be screed or polymer floor. Most recommend the second option, as it is considered an excellent basis for applying the image. If you want to decorate the coating with natural or artificial materials instead of a pattern, the main layer becomes the background. The polymer layer is applied to the rough base so that the surface is perfectly even. In the thickness of the floor there should not be a bubble, but this can be checked by the building level.
Drawing image
After the base layer is applied, you can proceed to the application of a drawing or decor. The image for the 3D floor is applied in two ways:
- By pasting the base layer;
- Using paint.
Of course, the second option will be the most spectacular, but it is too expensive. Since acrylic and polymer paints for floor images are not cheap. Most of the costs will go to the artist. If you decide on this method, then you do not need to save. The image quality depends on the impression of a volume floor. Pasting the picture is considered the most common method. As a drawing, a banner fabric or vinyl tile is used. Before applying the image, it is necessary to carry out the primer with a transparent polymer. The vinyl pattern is glued very carefully so that no bubbles remain. The drawing, made on banner fabric, is glued with a thin layer of glue.
Last coat
Before applying the last coat, it is necessary to calculate the volume of material. Consumption will depend on the thickness of the layer, usually it is 3 mm. For processing 1 sq.m. leaves up to 4 kg of transparent polymer material. The last layer is applied in this way:
- All components are mixed in a clean container with a drill;
- A transparent polymer mixture of uniform thickness is poured onto the image;
- Be sure to level the mixture throughout the floor;
- After that, the polymer layer is rolled with a needle aeration roller to remove all bubbles. You need to continue this until the components thicken.
When rolling and leveling are completed, you can only move around the floor in shoes with spikes on the sole. To make the floor very durable, it is covered for three days with foil or plastic wrap.

After the transparent layer has hardened, you need to apply a protective varnish. It will protect against chemical and mechanical damage, and this will significantly extend the operating time of the floor. In order not to slip on it, it is possible to cover with special varnishes with anti-slip properties.
Watch the video: 3D INTERACTIVE FLOOR DISPLAY PROJECTION, MAGIC MATT,DIGITAL 3D FLOOR FOR RENTAL ALL OVER INDIA (November 2024).


-
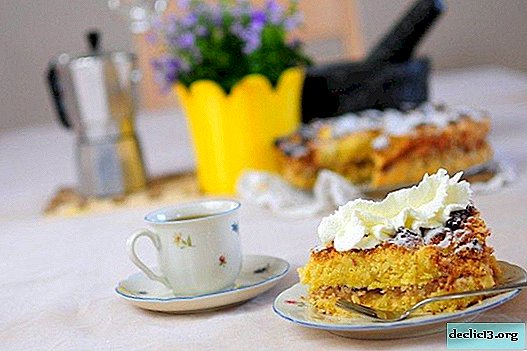
How to make Christmas cakes - step by step recipes
It is difficult to find a family who celebrates the New Year without a festive cake. For this reason, I will share step-by-step recipes for New Year's desserts. They will turn out to be equally useful to both experienced chefs and people who are interested in how to cook New Year's cakes at home. Recipe for puff sour cream cake To begin with, I offer a recipe for a wonderful cake, which includes puff and shortcrust pastry, and the layer is made of cream consisting of butter and sour cream. ... -
-
-