Recommendations to gardeners how to plant Jerusalem artichoke correctly in spring

Jerusalem artichoke, or tuberous sunflower, or earthen pear, or Jerusalem artichoke, is one and the same perennial plant of the genus Sunflower of the Astrov family, known for its useful properties.
You will learn how to properly plant such an unusual plant, when and what is worth doing in order to later collect these wonderful fruits in your country house. The article will also detail the choice of tubers and planting methods.
Neighbors and predecessors in the garden
You can grow Jerusalem artichoke after any garden crops! An earthen pear should be planted in early spring, as soon as the earthen cover thaws and dries. At this time, the earth is still wet and Jerusalem artichoke tubers easily take root in the soil. This is usually the time for planting potatoes. But it is better to plant Jerusalem artichoke after:
- potatoes;
- cabbage;
- cucumbers.
How to choose tubers and seeds?
 Planting material must be healthy so that the crop is not affected. Tubers and seeds should not have various root rot, nematodes and aphids.
Experienced gardeners choose even small tubers, the size of a chicken egg. It is better to choose germinated tubers, as they are more likely to take root in your soil. Jerusalem artichoke tubers have a very thin cork layer, this means that the tubers are poorly protected from drying out and mechanical damage. That is why it is better to plant already grown tubers. If they turned out to be very large, then they can be cut into several parts.
However, do not forget one important condition: each part must contain at least three eyes (for a rich harvest!), And the slices must be treated with charcoal.
If you decide or you had to buy seeds for planting, see that they are not flabby. If, however, during transportation and storage, they still turned out to be so, then soak them in plain water for about 3-4 hours, and the seeds will be ready for planting.
Where to plant - at home or in the open ground in the country, is there any difference?
Jerusalem artichoke is grown both in open ground and at home, in containers or in boxes with drainage. Planting Jerusalem artichoke is carried out only in heated open ground.
The growing conditions in the soil and in the container do not differ, so you can safely plant this plant at home. Only such a seed method is a little more complicated, it is already used by more experienced breeders. In addition, the grown plant will still need to be planted in the suburban area.
Landing Methods
- Seedling. Using this method, you can get the crop much earlier. In the nursery, the plant is most protected from pests, and a rich harvest of an irreplaceable plant will not keep the owner waiting.
- Reckless. For this method, you do not need to build additional structures. However, a timely and rich harvest is not guaranteed, Mother Nature may violate your plans.
- Seminal. This method is more suitable for experimental breeders, and for amateur gardeners it will be a burden.
- Tubers. This is the most common way among gardeners. You do not need to create any additional conditions, the plant itself quickly takes root and gives a long-awaited crop.
Step-by-step instruction and diagram
 Instructions for planting Jerusalem artichoke:
- Before you start planting Jerusalem artichoke, you must carefully select a site. The most correct option in this case will be a specially allocated area along the hedge, on which there will not be small tubers that give shoots and spoil your crop.
- Good neighbors include legumes (beans, peas), cabbage, radishes, turnips, onions, eggplant and berry bushes - currants, gooseberries.
- It is not advisable to plant parsley and celery, potatoes and tomatoes near Jerusalem artichoke.
The soil should be loose, pH 6.0-7.5, and the area should be adequately lit.
- Then you need to prepare the selected plot of land: in the fall to fertilize. Such can be rotted manure or compost with mineral fertilizers (superphosphate, potassium salt, ammonium nitrate).
- We proceed directly to the landing. If you have pre-harvested Jerusalem artichoke tubers, and they dried up, in this case they must be soaked in water for 4-8 hours before planting. In addition, it will be useful to soak tubers in a Zircon solution before planting. We are waiting for the soil to warm up to 16-18 degrees and begin to plant!
- Jerusalem artichoke is planted in rows, observing a distance of 60-80 cm between them. In a row, the distance between plants is 30-40 cm.
- If you decide to experiment and plant an earthen pear with seeds, then this instruction is for you. In a container with loose and well-absorbing soil, we plant seeds to a depth of about 7 cm. We close the container with a film or a lid, put it in a warm, light, comfortable place and wait for late spring to seedlings emerge.
- If you did not look for difficult paths and decided to plant tubers, then do not forget that the whole crop that you collect depends on the depth at which you plant them. If your site has heavy soil, then the planting depth is 6-8 cm, if light - 8-10 cm.
It is important to pay for the Jerusalem artichoke variety, the size of the crop depends on this. For example, in early-ripening varieties, it is recommended to use small (up to 20 g) and medium (20-50 g) tubers, and in late-ripening varieties, larger (over 50 g) tubers.
- Only healthy tubers are needed. You can plant both whole and cut tubers. Chopped tubers can only be used in spring plantings. Planted tubers should be covered with a rake with a small comb so as not to accidentally damage the tuber.
A few words about leaving after planting an earthen pear in open ground. The first days after planting, be sure to loosen the soil. About 2-4 weeks will pass before the first shoots. Then after about 40-50 weeks, you will get a finished crop.
Possible problems and difficulties
Planting Jerusalem artichoke is not a difficult matter, which even beginners will cope with. Jerusalem artichoke grows in any conditions, the only problem may be waterlogging of the soil, so be more careful with this. Also, if you do not want additional hassle, plant sprouted tubers (not seeds!), Then your crop will definitely be successful.
Jerusalem artichoke is a really useful plant. It will help with arthritis, diabetes, obesity. And just a faithful companion of a healthy person. Therefore, do not spare your energy for such a wonderful creature in your garden, especially since it does not require large material and time expenses!
Watch the video: How to Plant and Grow Jerusalem Artichokes - Sunchokes (November 2024).


-
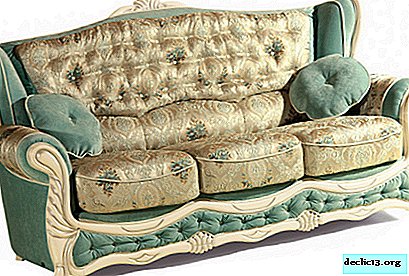
Options for corner beds, their place in the modern interior
Thanks to the efforts of designers, houses with non-standard layout apartments are increasingly being rented out. Proper arrangement of furniture allows you to effectively use this living space. Owners of unusual rooms will like a corner bed, which allows you to replay the space in a new way. A brief review will help you understand how practical this option is and choose the right model. ... -

-
-